Skin Tone
 By Albert Pedrosa
Photo Mania
I GOT a call from one of my students regarding skin tone. He asked what is the right skin tone and how do you achieve it. I paused and tried to answer the question, but I can’t even think of where to start. Skin tone is one of the most critical parts of retouching.
I’ve been editing skin tone for quite some time already. I remember my days working in electronic prepress where we use a color calculator to work between LAB and CMYK. We were crazy about tones from highlights, mid tone and shadows, and skin tone is one of the most elusive tones to control.
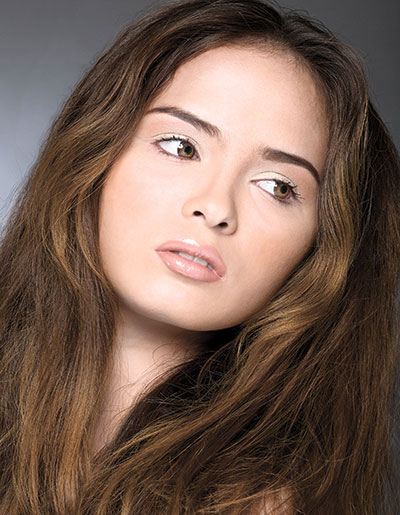
Personally, I have dark skin, referred to as “kayumanggi”. From the looks of it, you can easily assume that my tone belongs to the darker tones just after the mid tone. It turned out that my tone is between one-fourth tone and mid tone. This is above the highlights just before the mids.

This type of skin is closer to the European tone. There is a bit more Magenta, and less Red and Yellow based on the Asian toning formula.
The whiter your skin, the nearer it is to the highlight, but never within the area of highlights. Chinese skin would get a pinch of yellow in their skin tone, while Europeans would get a pinch of pink and less yellow and red. Given the racial mix, skin tone is variable and it becomes a decision to make for the photographer and retoucher on what tone they are after.
To help you get started with skin tone, here’s a guide to put you in the right footing when editing Asian skin tone. Using Photoshop’s eyedropper tool, you can sample the color mix of a particular tone. You can set it to show you the RGB or CMYK values. If you press and hold the eyedropper tool, you get an array of tools. Choose the color sampler tool.
Try clicking on a part of the skin that has not much influence of makeup. Somewhere in the chin or forehead normally works. Take multiple samples so you can compare. Notice the values of CMYK in the info palette. If it doesn’t show, click on the RGB values and look for the drop down menu and choose CMYK.
This technique is not absolute but it’s a good start to get your desired Asian tone. Follow the simple rules in adjusting the tone using your curves adjustment layer. Your objective is to adjust the CMYK values to the following rules:
• Cyan values should be one-half the value of Magenta
• Magenta values should be just below Yellow
• Black has less to nothing values when sampling from skin tones
Example: if C=20, then M should be 40 and Y should be around 42. If any of the numbers change, all the others will change as well but maintaining the same ratio. Once you achieve the values, make some small adjustments based on your taste.
Learn more about this technique by joining the forum at www.grp.ph/forum. Keep on shooting, everyone!
photomania.sunstar@gmail.com